Bill Wright
1949–1994
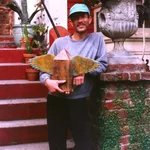
William “Bill” Eugene Wright was born in March 21, 1949, in Bonner Springs, Kansas, close to Kansas City, Kansas.
It seemed like Bill always wanted to be an artist. He experimented with photography, developing his own photographs. He moved on to drawing and oil painting, especially after he moved to San Francisco in 1979.
I once asked Bill what he was saying with his art and what it meant. He would only say “Who can describe the Mona Lisa?”
Late in his career, he turned to making wooden objects and painting them with a special technique doing a job making furniture. His last creation was a yellow and purple flying pyramid.
Bill was fascinated by photography and captured both wild and tranquil moments in time. A majority of these photos were taken in the 1970’s and 1980’s. The photos are about 5″x7″ hand printed by Bill on 8″x10″ photo paper. They are much more beautiful and crisp in person, the scans don’t do them justice.
Bill died in 1994 while planning more art projects.


PAINTING TECHNIQUE:
I learned the basis of the technique for painting the boxes and mirror frames while working for a furniture maker, named Robert (“Hutch”) Hutchinson of Robert Hutchinson Designs, before 1990 (1232 Sutter Street, San Francisco, California, 94109).
Robert Hutchinson designed and made furniture of plywood that had cutouts done with laser. The “Nicoya” chairs, which were 3-legged with hand finished open-work and fabric or leather upholstery, sold for $7,000. I worked for him doing sanding and painting. He was described in the book “San Francisco, A Certain Style,” by Diane Dorrans Saeks. I quit working for him because he was a little too much of a slave driver.
With my version of the painting technique I used more intense colors and brighter combinations than “Hutch” did. He used more pastels and more subtle color combinations. With the color combinations I was trying to create beauty. I was trying to make veins like marble. They had the quality of fractals.
The first step in the painting process is to sand the wood smoothly and “fill” all the defects with spackle. Sometimes, it takes two fillings with spackle. The surface has to be fairly smooth because defects are hard to hide with paint, even though the paint is thick.
I don’t mind a few defects, but joint defects, that show where the wood is joined, should be avoided. They don’t look natural, and you are trying to cover the appearance of wood and have the object look like ceramics or stone.
The base coat does not have to be black. But remember the base coat color, so you won’t sand through it back to wood later.
The black base coat is usually stippled. To stipple is to paint with dots or light touches, instead of strokes.
The formula for mixing the black undercoat with which all of the pieces are painted is as follows:
- One part flat black latex paint.
- One part “Mud” (“All Purpose Sheetrock Joint Compound”).
- One cup Elmer’s glue, which acts as a binding agent.
The same formula is used for subsequent coats of paint, except that the latex paint used is white and proper color pigment is added depending upon the color desired. I have used “All Tint” Universal Concentrated Colorant and “Liquitex” Acrylic Artist Color. The amount of tint used is determined by the color desired.
I start with the electric sander to get off the roughest parts of the paint. Then use 80 or 100 sand paper and gradually work to the finer grains. Finally, use steel wool to polish the finished work. As you sand with increasingly fine grain paper and steel wool, you get more intricate patterns in the paint.
I used a Dremel to sign the works and sometime to shape them, as with the wings on the winged obelisks.
TABLES.
The first piece that I made was a table. I found the base on the street and took it home and put a top on it. I tried to finish it like marble. I had seen Italian tables that had several kinds of marbles inlaid. The basic table was painted like black marble and the inserted section on the top was ochre, etc. Masking tape was used when different sections were painted different colors, to create a sharp edge between the colors once the paint is sanded smooth.
The second table was large and was one that Peter Bailey had made, but never finished.
PAINTED BOXES.
We made several sizes of boxes: Smurf houses, obelisks, and pyramids.
I wanted to make a present for Lisa’s wedding in September 1989; so, I decided to make a box. It was a slightly squatty obelisk. The outside represented the male element and the inside represented the female. The shape was masculine; but, the top comes off, making a female repository. The outside was green, yellow, and orange. The inside was dark blue and light blue. The outside was sunny and the inside was more like the moon.
I made the first pyramid and finished it with brown colors in December 1989. The pyramids that Ederi Haggenmiller cut out were about 7 inches tall.
It took a while to figure out how to make a pyramid. The early ones were made of plaster, before I figured out how to make them out of wood. They then had a central pedestal to make them stronger. After Ederi started cutting out the pieces with power tools, the corners were fitted better and stronger so the pieces supported each other and the pedestal was no longer necessary. The pieces then became lighter.
I made my first obelisk and finished it black and red in 1990. After Ederi started cutting out the obelisks, they were about 14 1/2 inches tall.
I made a yellow and black tea box before October 1990.
One of the first Smurf houses that I made was sold to a woman who was an interior decorator. She wanted to use it for a client who needed a bedside condom container. The small boxes were about 9 1/2 inches tall after Ederi started cutting them out. The original Smurf houses were shorter.
The pieces for the boxes are cut from 1/2 inch plywood. The tops of the boxes are four-sided pyramids and are made from 5 pieces of wood. The base of the lids are shaped so as to fit inside the main box, so as not to slide. The four sides of the tops are made so as to lean on each other to be self-supporting. The boxes themselves are made of 5 pieces of wood.
The bases of the pyramid boxes are more complicated since they contain a square box within a pyramid. Everything must be made to fit correctly where the lid sides on the box. Since there is a space between the square box and the pyramid, care must be taken so that there is no debris inside that will rattle when the finished box is turned over.
SUN MIRROR FRAMES.
The first mirror frame was made in 1990 because the wall of the front hall of my apartment at 1000 1/2 Dolores needed a larger mirror. I wanted ornamentation on it and not just a square frame. The frame’s shape was like a Mexican tin frame with scallops on the top. This was approximately in December 1990. It was cold. I saw what Hutch was making and decided to improve his technique. The colored paint was stolen from Hutch. I quit working for Hutch after making the big mirror. He was such an asshole to work for. These mirrors were called sunburst frames.
The sun is bas-reliefed and made of Fixall poured in the bottom of cottage cheese containers. A screw is put in the back to hold the piece to the flat part of the frame. The Fixall dries in 1/2 hour and can be attached to the frame and spackled so it looks like the sun is a solid piece with the frame.
The sun’s rays are made of two strips of triangle wood glued together. When the tips are cut off at an angle, a diamond shape is formed which looks nice when metal leafed at the end of the painting process. The glow at the end of the ray is like the glow at the end of a fiber optic tube.
The back of the mirror frames were leafed around the inside hole for the mirror so that the leaf would be reflected around the mirror instead of wood.
MOON FRAMES:
Later, I made the first moon mirror frame with the moon and stars at the top and ocean waves at the bottom. I had done a number of sunburst frames and wanted to do one of the moon, on the night time, something romantic. The moon frames reflect the feminine side.
The first moon frame was black, gray, and white for the night time. The moon and the five stars at the top were leafed. The ocean waves at the bottom were made of triangle wood in a zig zag pattern. They were copper leafed as if they were reflecting the moonlight.
The second moon frame was the red pattern and made like the first one. It was made for my doctor, Dr. Jay Lalezari.
I always liked how the frames looked without mirrors, though. Adding mirrors changed them and detracted from their appearance.
PICTURE FRAMES:
I started making picture frames because certain pictures that I had seemed to need special frames to set them off. The green parrot pattern of paint was devised to frame a print that I had of a parrot. These frames were made of a backing base of square lumber to hold the glass and picture. On the front, we used half-round wood to hold the glass in.
LAMPS:
The obelisks could be turned into nice lamp bases. They were 24 inches tall with the shades. The Smurf houses could also be made into smaller lamps that were 17 inches tall with the shades.
The tops of the boxes were nailed to the bases and finished as one piece. A hole was drilled through the whole piece to hold the central lamp rod. When the piece was put together, it vibrated like a musical instrument when it was sanded.
We looked for a long time to find square shades to compliment the square lamps. We finally found them at Foss Shades in Oakland, California. The family has been making shades for three generations.
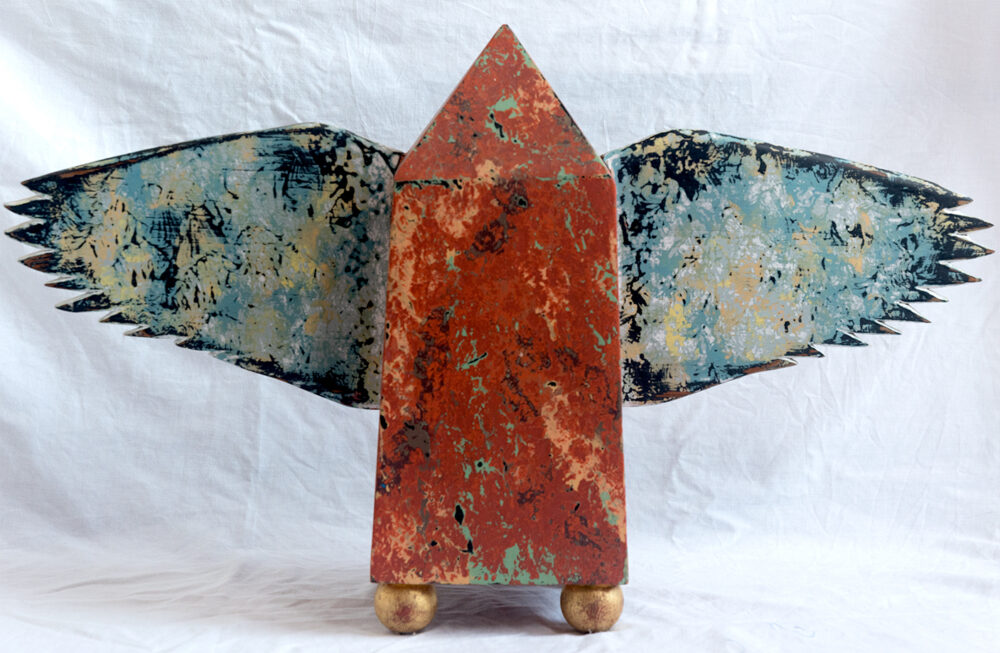
WINGED OBELISKS & PYRAMIDS:
Around August 1993 we started making winged obelisks and pyramids. We were bored with making lamps and wanted to make something more sculptural.
The original wings had been cut out to hang in the eaves of our apartment to try to scare away the pigeons. They were cut out of plywood, painted black, and hung outside on a cord. The pigeons were not scared and actually tried to land on them.
When we made the first winged pyramid, the size of the wings was reduced and they were cut out of a piece of 1 by 6 inch cypress.